Nubis-Skel Working Lab
In this lab we will walk through obtaining a release from the nubis-skel repository, building an AMI and deploying it into AWS. We will then modify the application code, rebuilding and redeploying the application.
Get the code
Next grab the latest release, extract it and copy the nubis directory into your code base.
wget https://github.com/nubisproject/nubis-skel/archive/v1.2.2-training.tar.gz
tar -xvf v1.2.2-training.tar.gz
cd nubis-skel-1.2.2-training/
Change the name of the application
Here we will change the name of the application. When you are deploying your own application you should change this to what makes sense. For the sake of this lab, you should use some form of your user name.
NOTE Do not use myapp here, it will cause a build error
NOTE2 Do not exceed 12 characters for the app name (ask me why if you are interested)
grep skel * -rl | xargs perl -pi -e's/skel/myapp/g'
Build The Application AMI
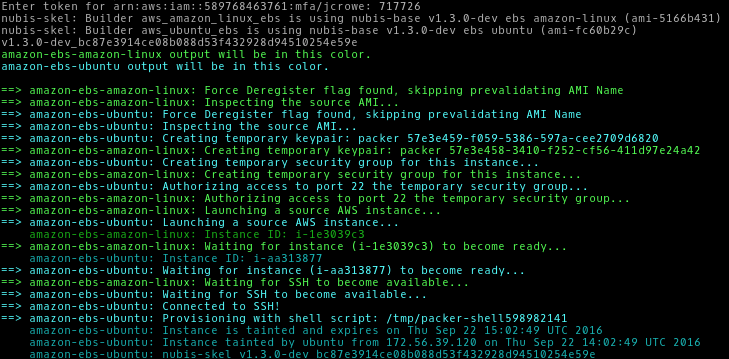
It is time to build a new AMI. We will use nubis-builder to do this. You should already have installed nubis-builder by following the instructions in the prerequisites document.
nubis-builder build
You should see something like this:
Capture The AMI ID
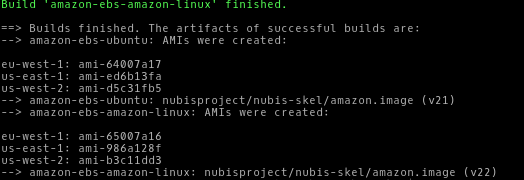
You will need to record the AMI ID for ubuntu in us-west-2 from the nubis-builder outputs.
In this example that would be us-west-2: ami-d5c31fb5, however your AMI ID
will be different.
Deploy With Terraform
Now that we have built the AMI we can use it to deploy into AWS using Terraform. Again this tool should have been installed by following the prerequisites document.
All of the terraform commands should be run from the nubis/terraform
directory. We will also set some variables for convenience.
NOTE: If your POSIX login is different from your local user name you may
need to replace the $USER variables below with your POSIX user name. Do
not use your entire LDAP login here. Say your LDAP is me@mozilla.com,
you would use me.
NOTE-2: You need to use the AMI ID from the nubis-builder outputs to
include it in the AMI_ID variable here.
NOTE-3: Make sure to edit SSH_KEY_FILE to point to a valid ssh public
key.
cd nubis/terraform
export ACCOUNT_NAME="nubis-training-2016" USER_LOGIN="$USER" \
SSH_KEY_NAME="$USER-skel" SSH_KEY_FILE="~/.ssh/XXX.pub" AMI_ID="ami-XXX"
Configure The Deployment
In this step we will create our terraform.tfvars file. There is an
example terraform.tfvars-dist file that you can copy and edit or you can
run the following commands.
NOTE: For all of the copy-paste examples, some users have reported having to
remove the curly brackets { }.
cat <<EOF > terraform.tfvars
account = "${ACCOUNT_NAME}"
region  = "us-west-2"
environment = "stage"
service_name = "${USER_LOGIN}"
ssh_key_name = "${SSH_KEY_NAME}"
ssh_key_file = "${SSH_KEY_FILE}"
EOF
Get Terraform Modules
The first step will be to grab the terraform modules that we use to deploy the application.
terraform get -update=true
You should see something like this:

Plan The Deployment
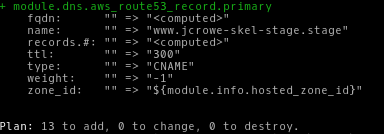
Next we will run a terraform plan. This will show us all of the resources
that we are about to create in AWS. We will be using the aws-vault tool which
you installed and configured when following the instructions in the
prerequisites
document.
aws-vault exec ${ACCOUNT_NAME}-admin -- terraform plan -var ami=${AMI_ID}
You should see something like this:
Apply the deployment
Finally it is time to deploy our application into AWS. We do that by running
a terraform apply.
aws-vault exec ${ACCOUNT_NAME}-admin -- terraform apply -var ami=${AMI_ID}
You should see something like this:

If you get an error similar to this one you will need to edit
your terraform.tfvars file and shorten the service_name.
* aws_elb.load_balancer: "name" cannot be longer than 32 characters: "longusername-myapp-stage-us-west-2-elb"
Verify it worked
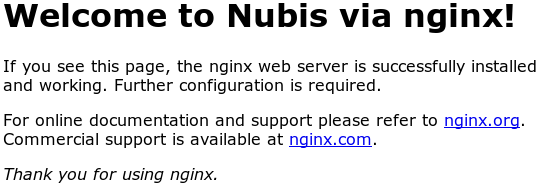
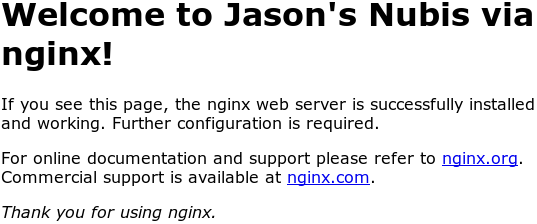
Load the address from the Outputs: you got during
the terraform apply above and you should see the nginx
default index.html page.
Update The Application
Now we are going to make a change to the application. You can customize the
application to your liking. The commands here will have you simply edit
the index.html file and add some custom text. Then you will rebuild the
AMI by running nubis-builder build, thereafter a terraform plan
followed by a terraform apply.
NOTE: Remember to use the new AMI ID from the nubis-builder outputs
and include it in the AMI_ID variable here.
cd ../.. # You should be in the root nubis-skel directory here
vi nubis/puppet/files/index.html # <--- Make awesome changes
nubis-builder build
export AMI_ID="ami-XXX"
cd nubis/terraform && \
aws-vault exec ${ACCOUNT_NAME}-admin -- terraform plan -var ami=${AMI_ID}
cd nubis/terraform && \
aws-vault exec ${ACCOUNT_NAME}-admin -- terraform apply -var ami=${AMI_ID}
Verify your changes
Load the address from the Outputs: you got during
the terraform apply above and you should see your updates to
the index.html page.
Logging on to your instance
The web server that we deployed is runnign in a private subnet. In order to ssh to the web server we will need to go through a jumphost. Replace "myapp" in this command with your app name.
ssh -A -t ec2-user@jumphost.stage.us-west-2.${ACCOUNT_NAME}.nubis.allizom.org \
"ssh -A -t ubuntu@${USER_LOGIN}.nubis-myapp.service.consul"
Loggin into the AWS web console
If you need to get into the web console you can do that with the aws-vault command.
aws-vault login nubis-training-2016-ro
Create your own repository
Now we will walk through creating your own repository onGitHub. This will enable you to collaborate with other s using the workflow we discovered in the previous lab.
Initialize the repository
The first step is to initialize the repository.
git init
You should see:
Initialized empty Git repository in ~/nubis-skel-1.2.2-training/.git/
Next lets add all of the files:
git add .
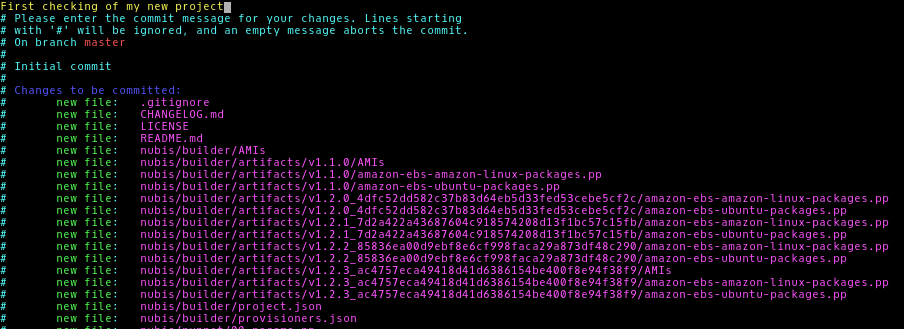
Now we need to commit our (new) changes:
git commit
Add a nice commit message like First checking of my new project
Create a new repository on GitHub
You need to be logged into GitHub for these steps. If you are not already logged in head over to GitHub and login.
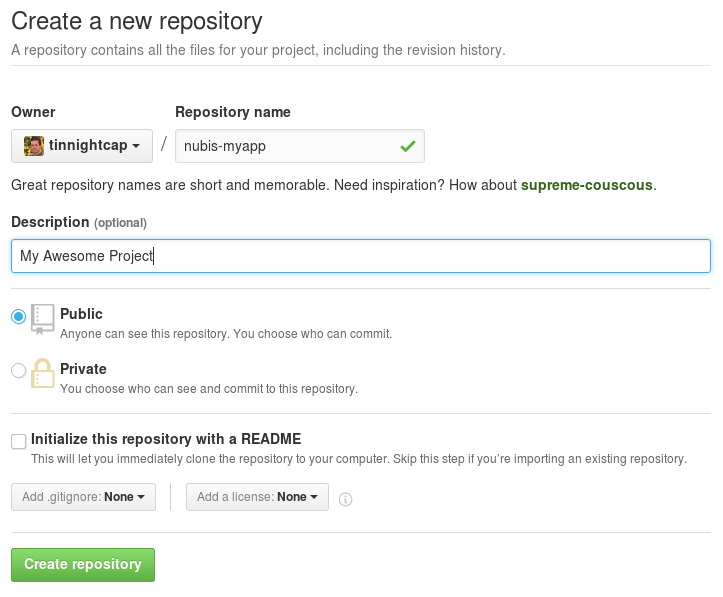
Next create a new repository here
You will need to name your new repository and add a description. You do not need
to add a README or a LICENSE as they are already included with the nubis-skel
project. then click the “Create repository” button.
Now you will need follow the second set of instructions
under “Push an existing repository…”.
git remote add origin git@github.com:username/new_repo
git push -u origin master

Clean Up The Deployment
Lastly, we should clean up our deployment. In AWS everything costs money. Add onto that the fact that when using terraform it is quick to start up and shut down your deployment. It just makes sense to shut them down at the end of the day.
cd nubis/terraform
aws-vault exec ${ACCOUNT_NAME}-admin -- terraform plan -var ami=${AMI_ID} -destroy
aws-vault exec ${ACCOUNT_NAME}-admin -- terraform destroy -var ami=${AMI_ID}
You should see something like this:

About the AMI ID
As a final note. You can place the AMI ID into the terraform.tfvars
file if that fits your work-flow. ami = "ami-xxx". In that case you can
omit the -var ami=${AMI_ID} portion from all of the commands above. Just
know that you will need to update it every time you rebuild the AMI.
In fact all of the variables in the terraform.tfvars file can be either
replaced or overridden in this way.
FIN
Well that is it for this working lab. I hope you had fun and learned a bit about
deploying into AWS using Nubis. As always if you have questions feel free to
reach out to us at nubis-users@googlegroups.com or find us
on irc.mozilla.org #nubis-users.
Thanks for playing.